

Thursday, September 27, 2012
Tuesday, September 25, 2012
{read: mystery} And When She Was Good by Laura Lippman

There was an interesting back story that I found more compelling than the present-day story, and I wondered if Lippman had to weigh the present story down with inner workings of the business side of prostitution to give her enough time to tell us the back story, since she switches back and forth between the two storylines. If so, I wish she had found another way to fill those pages. The back story was compelling, and I wanted the current story to keep up. Despite the high-profile cases in the news about other suburban madams, these sections ended up being boring reading. Finally, the ending was predictable. All in all, this was not one that I'd recommend if you're looking for a compelling page-turner or even a mystery.
Full disclosure: I haven't read any of Lippman's Tess Monaghan books, so I don't know how this compares. I did read her standalone novel Life Sentences a few years ago and enjoyed it.
For those of you keeping track, this is the first one I've finished on my fall TBR list. So far, I'm 0-1 in good reads.
And When She Was Good by Laura Lippman (William Morrow, 2012)
My rating: 2.5 stars
Monday, September 24, 2012
{crafts} Washi Mural Tutorial
Have you ever wanted to decorate a wall, but weren't sure you wanted it to be permanent? Here is a great create a temporary, but colorful mural. This one is from How-Tuesday on Etsy.
Here’s a little tutorial on how to make a mural using only removable washi masking tape.

- A variety of washi tapes
- A blank wall
- Scissors
- Pencil and paper for designing
- Cutting knife (optional)
Directions:

Make a design. It may be wise to first draw a design on a small scale on paper, or maybe with very thin pencil lines on your wall. If you choose the latter, be careful: washi tape is transparent, so you may see the drawing underneath. Also, since the tape is removable, you can remove it easily from your wall when you don’t like the mural anymore, but this may be a lot harder with pencil lines. Of course, you can also do what I did: just get started without a plan, with lots of complaining, swearing and ripping misplaced tape from the wall until you finally get somewhere. I started with the big house image in the middle and then worked from there towards the sides.

Choose a style that works with the tape. Lucky for me, I happen to have a naive, childish and folkloric design style, but if you have a super baroque and detailed or extremely subtle design style, it is wise to realize that washi tapes have their limitations. It is hard to cut really detailed shapes from sticky pieces of tape (if you really want to cut something difficult, you can stick the tape to a piece of paper or a cutting mat first, cut it in the right shape, and then remove the paper again. Be careful — this may lessen the sticky strength of the tape, and you do need the tape to be sticky enough if you want the mural to last on your wall for some time).
Also, most tapes have great length but aren’t very wide, so if you want to create wide (solid) images, you have to assemble them from various pieces of tape, which gets complicated. Curly lines and shapes are possible, but require more precise cutting and pasting. Optimally, it’s best to use the characteristics of the tape, and work with straight lines and simple shapes.

Be ready to make a mess. Or maybe that’s just me… After some fanatical cutting and pasting, little sticky pieces of tape were literally everywhere: on the floor, under my shoes, in my hair, and even on my sweet baby’s neck. (I often worked on the mural in her room, sitting next to the bed where she was napping, and when she’d wake up, I had to take her out of bed with those sticky fingers!)

Finishing up. Once the mural is to your liking, rub the pieces of tape with your fingers so that they won’t come off the wall that easily (though with a bit of scratching you should still be able to remove the tape at any time).
Voila! Here’s your washi tape mural! I hope I’ve inspired some of you to use some of your washi tape in a creative splurge.
All photographs by Ninainvorm.
Tuesday, September 18, 2012
{read: South African psychological mystery} Dead Before Dying by Deon Meyer

Capt. Matt Joubert is still in bad shape two years after his wife, a vice cop, was killed in the line of duty. His work has suffered, and his new supervisor has laid down some clear expectations. Not only must his work improve, but he must also become healthier, losing the weight he's gained. He's also required to see a psychiatrist. Joubert complies, although not always happily, and in the meantime tries to solve a series of murders in which seemingly unconnected people are being shot point-blank. Could it be politically related? Are the Chinese involved? A series of bank robberies may be connected, and it's up to Joubert to untangle both cases while confronting his personal demons.
The style of this reminded me of the Scandanavian authors such as Jussi Adler-Olsen, and the exploration of the psychology behind the crimes reminded me of Irish author Tana French. If you like either of these writers, I'd recommend this book.
Dead Before Dying by Deon Meyer (Little, Brown and Company, 2008)
My rating: 4 stars
Monday, September 17, 2012
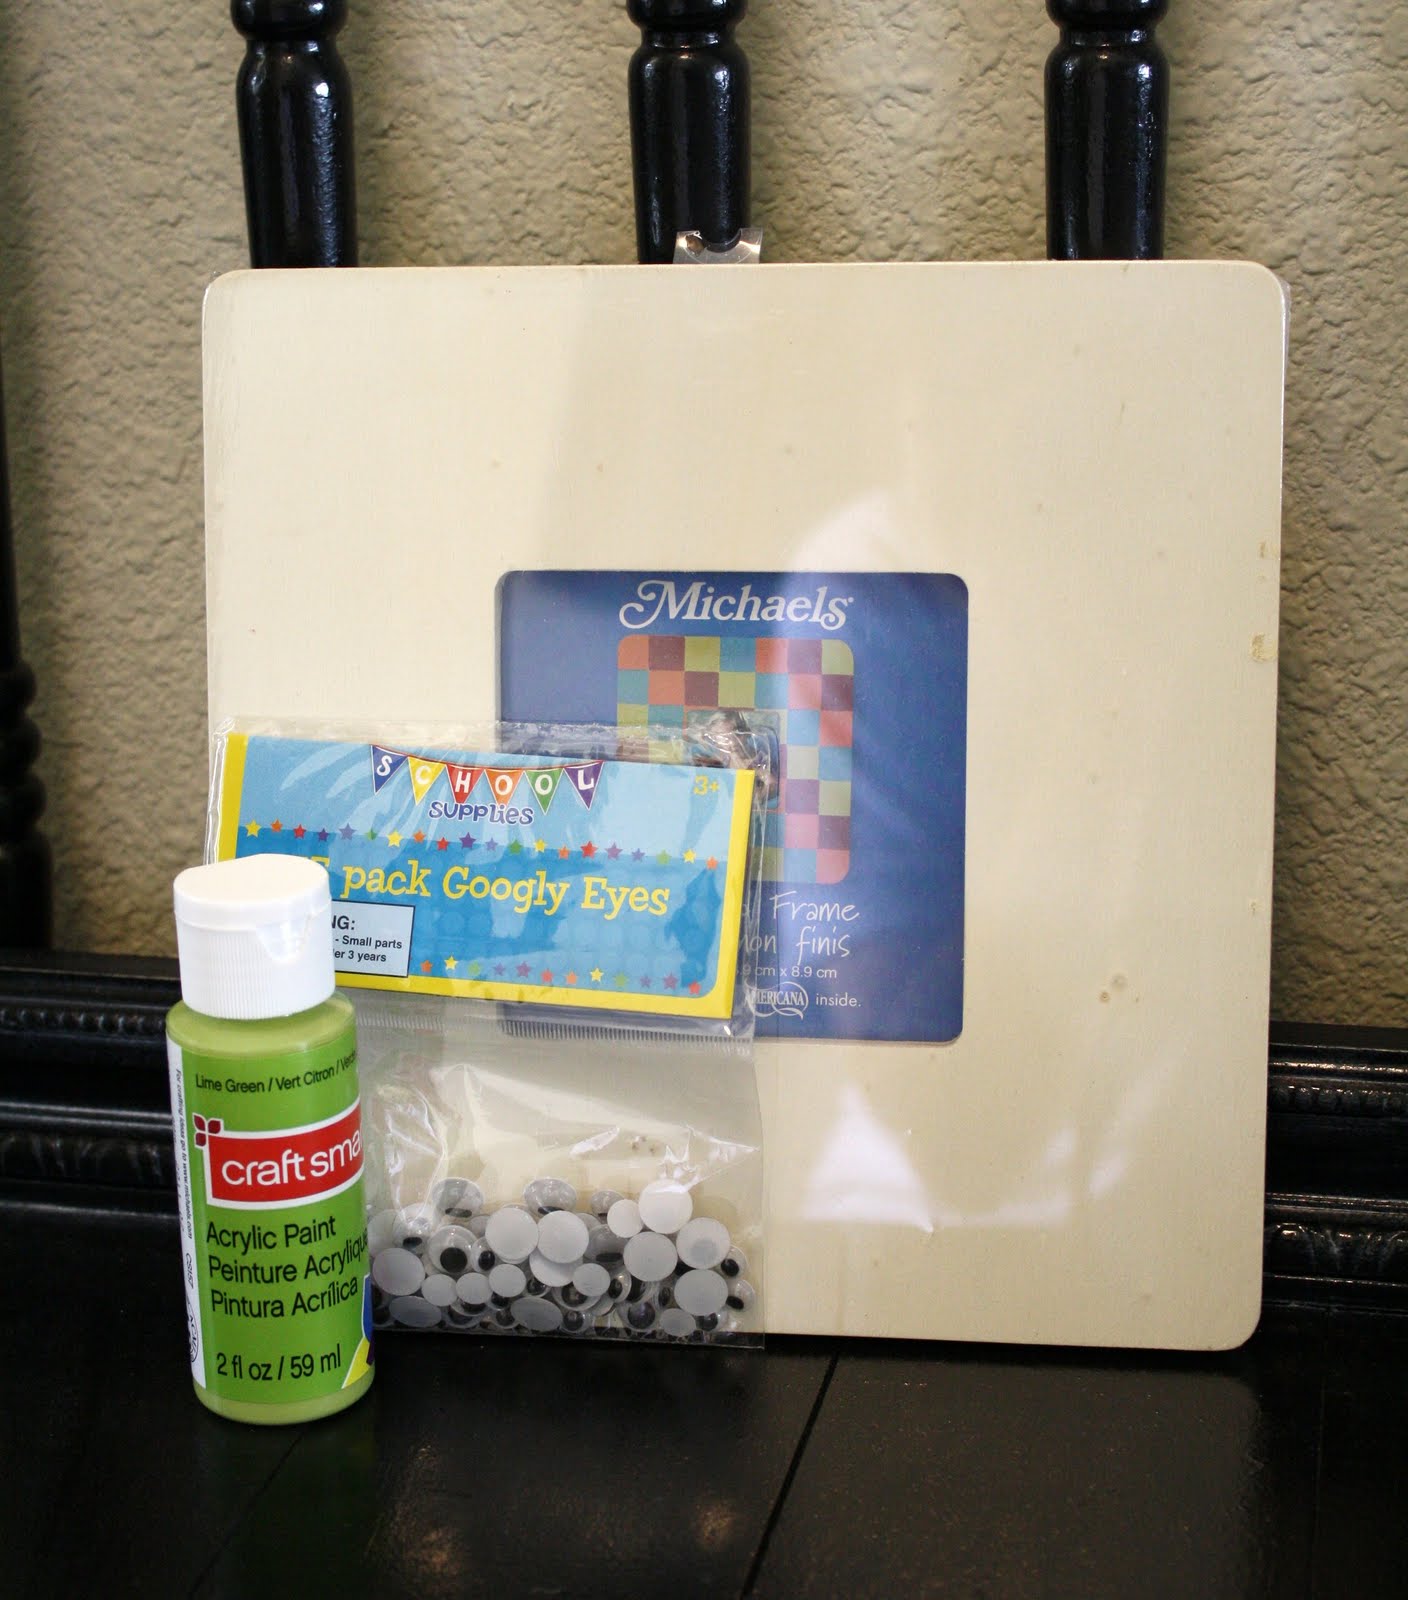
{crafts} Googly Eye {Halloween} Frame
Googly Eye {Halloween} Frame
Here is a cute tutorial for a Halloween themed frame from A Diamond in the Stuff.

I just couldn't contain myself anymore....I am just SO in the mood for some "Fall" projects!!! I had this idea floating around in my head and just couldn't wait any longer to make it.
Wanna make a fun googly eyed Halloween frame too?
Gather your supplies:
-$1 Michael's picture frame
-Some lime green craft paint
-Lots and lots of googly eyes
-A couple embellishments (I used ribbon and chipboard letters)

I painted the picture frame with the craft paint and started gluing the google eyes on and glued some more eyes on.....and then glued even more on. This took quite awhile!

Once all the eyes were glued on...I took a breath...and then cut "EEK" out of some chipboard with my cricut. I painted the letters the same color as the frame. I decided to attach the letters to the frame with a sparkly black piece of ribbon. Of course I didn't have any glittery black ribbon so I just decoupaged some glitter onto some plain black ribbon.

Look at all that googly eye goodness!!!

Thursday, September 13, 2012
{a thought for Thursday} Magic
Those who don't believe in magic will never find it. — Roald Dahl, who would have turned 96 today
Tuesday, September 11, 2012
{read: hot fall books}

Here's what my fall TBR looks like:
Gone Girl by Gillian Flynn (I know, I know - everyone's already read this one!)
The Absent One by Jussi Adler-Olsen
And When She Was Good by Laura Lippman
The Sandcastle Girls by Chris Bohjalian

And here are two on my TBR that were released a while ago:
A Feast for Crows by George R. R. Martin (this series was my summer series, now extending into fall)
The Sisters Brothers by Patrick deWitt (and it has such a great cover!)
What are you reading this fall?
Monday, September 10, 2012
{crafts} Glow-in-the-Dark Q-Tip Skeleton & Garland Tutorial
Are you hosting a Halloween party? Here is a great tutorial for a party decoration, that is cheap and easy to create. This tutorial can be found at http://www.thecraftycrow.net/halloween/.
Glow-in-the-Dark Q-Tip Skeleton & Garland Tutorial
Glow-in-the-Dark Q-tip Skeleton Garland Tutorial
Supplies:
handful of Q-tips
scrap of white cardstock
black permanent marker
glow-in-the-dark acrylic paint
paint brush
thick white glue
black felt
yarn
needle and thread
break Q-tips into bones for the skeleton
Draw and cut a skull from white cardstock;
click on the image above for directions on
how to draw a simple skull.
Paint your skull with the glow-in-the-dark paint
and let dry before adding the face details.
Paint your bones with glow-in-the-dark paint and let dry.
Cut felt rectangles large enough to hold the skeletons and
with at least two inches of space at the top if you are
going to make it into a garland.
Glue the skeleton and skull onto the felt and let dry.
To make a garland:
Fold over top edge of felt, about 1", and stitch with black
thread and a running stitch to create a channel
for the yarn.
Run the yarn through the felt channels and
your garland is ready to hang!
Wednesday, September 5, 2012
{crafts} Heating Pad Tutorial
I made a heating pad out of rice years ago and used it over and over. My favorite time of year to use it was on cold winter days. Just pop it in the microwave and you have an instant source of warmth. It is also great for aches and pains! Here is a detailed tutorial from thegreenwife.com.
Heating Pad Tutorial
So this is a project that’s been in the back of my mind for months, but it took finding the perfect fabric to get motivated and get going on it. When I laid my eyes on Amy Butler’s LOVE flannels, I knew it was time. I chose this vibrant, yet soothing flannel and got busy.
See, there’s a particular day each month *ahem* that makes me yearn for a good, heavy heating pad, but by the time my body reminds me that I want it….well, I’m just too crabby to sew.  This month, though, I’m prepared.

Gorgeous, right? If only you could feel, smell and pet it. It turns out that Amy Butler’s super-luxurious flannel + rice + lavender essential oils = heaven. In case you were wondering.
I didn’t have the details for the heating pad worked out in my mind, but I find if I just start cutting fabric….it just all works out. Usually. This was one of those fortunate times and I’m thrilled that it only took my one shot to achieve the sectioned heating pad glory I was after. I was nervous that I would fail at achieving the sectioned design that I was picturing in my mind, but I came up with a little trick that makes it super easy.
Ready to begin? You know you want one! I knocked this one out in under an hour while still in my pajamas this morning.
Cut two 19″ x 8″ rectangles of high quality flannel. I bought 1/2 yard of this one and it’s enough to make 2 heating pads.
Serge (without cutting fabric) one of the short ends of each piece. (I don’t like raw edges.)

Pin your pieces right sides together.

Serge 1/4″ along the two long sides and the other short end. This short end will be the “bottom” of our project for tutorial purposes.

Then, on your open end (top) start sewing approximately 1″ from the side with a 1/4″ seam allowance. Continue around the fabric until you return to the top edge and stop when you’re about 1″ into it again. That makes very little sense, so here’s a pic:

Now you’re nice and reinforced. We want this thing to be sturdy and never leak so much as a grain of rice!
Cut diagonally across all 4 corners without cutting into your seam.

Turn it right side out, make your corners nice and square, press it and topstitch along the edge.

Starting at the seamline at the bottom of your project, mark the pad into six 3″ sections using a chalk pencil. My lines didn’t show up very clearly in the pictures, but you get the idea.
I think.

Put 4 1/2 cups of uncooked rice (or flax seed or whatever filler you prefer. I like the weight of the rice. ) in a large zip baggie and throw in some of your favorite essential oils. Shake! Shake! Shake!

Now, take 3/4 cup of your rice/oil mix and dump it into your heating pad.

My concern was how to contain the rice long enough to sew the barrier seam. Hmmmmm…..A-HA! A temporary barrier! I pinned the rice back about 1/2″ away from my marked line leaving just enough room for the presser foot to pass by.
The problem with that was that it was a tad difficult doing it with the pad lying flat on the table (or my bed as you see in my pics. ) So…..I hung it from my ironing board using my iron to weight it down. Work with gravity, baby.

Stitch it up and repeat for all 6 sections.

After filling your final section, sew your barrier seam near the top edge and then the folds in and zigzag the very edge.

That’s the toughest part…and it’s not even so tough. And…you’re done!
You’re final product will measure 18″ x 7″ which is ideal for abdominal cramps, sore lower back or tense neck.
It rolls up nicely to tuck into a bedside drawer.

And I’m pretty sure that my next project will be a cute little drawstring bag in a coordinating fabric. Perfect for storage and for gift-giving. I’ll keep you posted on that project.  EDIT:Drawstring Bag Tutorial has been added!

Stick it in the microwave for around 2 minutes. Of course, this time varies from one microwave to the next. Just be very careful not to overheat (it will stink and can hurt ‘cha!).
Also….you can store it in your freezer for cold therapy on an injure knee, back, etc…
So…there you have it. Now get busy!
Subscribe to:
Posts (Atom)